8 Best Pavers for Building Durable Garden Walkways
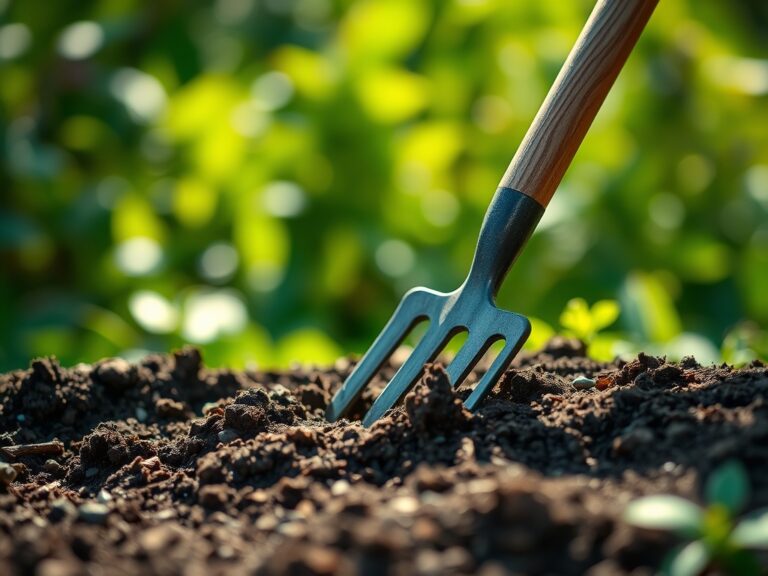
The smell of crushed stone dust and damp earth signals the beginning of a permanent path through living borders. Selecting the best pavers for garden walkways determines whether a route thrives for decades or fractures under freeze-thaw cycles within three seasons. Proper material choice accounts for soil drainage, root interference, and pedestrian load while maintaining aesthetic coherence with surrounding plantings. This guide examines eight durable options through the lens of site preparation, installation timing, and long-term performance.
Materials
Natural Flagstone (pH-neutral, 6.5-7.0 substrate compatibility): Sedimentary slabs ranging from 1.5 to 3 inches thick. Bluestone and Pennsylvania slate offer compressive strengths exceeding 12,000 psi. The irregular edges require a 4-inch crushed limestone base (0.75-inch minus) mixed with granite screenings for optimal cation exchange capacity and drainage.
Porcelain Pavers (inert, no soil pH impact): Through-body composition eliminates surface delamination. Rectified edges allow 3mm joints filled with polymeric sand containing 15% silica fume. Base preparation demands a 6-inch compacted aggregate layer at 95% Standard Proctor Density.
Reclaimed Brick (slight alkalinity, 7.2-7.5 leachate): Chicago common or Baltimore pressed brick supplies compressive strength near 8,000 psi. Efflorescence indicates soluble salts that require a year of weathering before mortarless installation. A 2-inch coarse sand bed (ASTM C33) accommodates settling without binding roots.
Concrete Pavers (pH 8.5-9.5 initial cure): Wet-cast units contain 3,500-4,000 psi concrete. Dry-cast versions reach 8,000 psi through vibration and compression. Edge restraints (aluminum or steel) prevent lateral creep. The alkaline runoff requires 18 inches of clearance from acid-loving species like Rhododendron and Vaccinium.
Decomposed Granite (pH 6.0-7.0, trace phosphorus): Stabilized blends incorporate 12-15% resin binder. The surface remains permeable at 120 inches per hour infiltration rate. Install over landscape fabric with 300g/m² density to block Cynodon dactylon rhizome penetration.
Gravel (variable pH based on source lithology): Pea gravel (0.25-0.50 inch diameter) compacts poorly. Angular crushed granite (0.75-inch minus) interlocks at 2,500 pounds per square foot bearing capacity. Avoid limestone variants near ericaceous plantings due to calcium carbonate buffering.
Rubber Pavers (chemically inert): Recycled tire crumb molded at 10mm thickness. Drainage occurs through 8% void space. Root intrusion remains negligible, though surface temperatures exceed stone by 15°F in full sun, altering microclimate for adjacent Hosta and fern colonies.
Permeable Interlocking Concrete Pavers (PICP, pH 8.0-8.5): Open-cell designs maintain 20% void ratio. The aggregate subbase (No. 57 stone, 0.75-1.0 inch) provides mycorrhizal fungi habitat while storing 0.5 inches of runoff per inch of depth.
Timing
Installation windows align with soil workability and frost penetration depth. Hardiness Zones 3-5 require completion before October 15 to allow base compaction before ground freezing. Zones 6-7 extend the season through November 30. Zones 8-10 permit year-round installation but avoid saturated soils that prevent achieving 95% compaction.
Excavation depth equals paver thickness plus base depth plus 1 inch for bedding layer. Clay soils (cation exchange capacity above 20 meq/100g) demand additional 2 inches of base to counteract expansion. Sandy loams allow reduced aggregate depth but require geotextile separation fabric (Class 2, 8 oz/yd²).
Phases

Excavation Phase: Remove topsoil to 8-12 inches below final grade. Preserve removed loam for amending planting beds along walkway margins. Compact subgrade to 90% density using a plate compactor (minimum 5,000 pounds force). Slope the base 2% perpendicular to walkway length for drainage.
Pro-Tip: Inoculate excavated edges with Rhizophagus irregularis spores at 200 propagules per linear foot to establish mycorrhizal networks for adjacent ornamental roots.
Base Installation Phase: Spread crushed aggregate in 3-inch lifts. Compact each layer to 95% density before adding subsequent lifts. The penultimate layer receives a 1-inch bedding course of coarse concrete sand (ASTM C33, modulus of fineness 2.5-3.0). Screed the sand using a notched straightedge set on edge forms.
Pro-Tip: Add 5% by volume of biochar (particle size 2-5mm) to the bedding sand to increase water retention and provide long-term phosphorus buffering near paver joints.
Paver Setting Phase: Begin at a 90-degree corner or established grade point. Maintain consistent joint width using 3mm spacers for rigid materials or 0.5-inch gaps for flagstone. Tap units level using a rubber mallet over a hardwood block to prevent edge chipping. Check every fourth course with a 4-foot level, adjusting sand bed rather than shimming individual pavers.
Pro-Tip: For flagstone installations, orient cleavage planes perpendicular to primary traffic flow to prevent delamination under repetitive heel-strike loading.
Troubleshooting
Symptom: Joint sand erosion exposing 0.25 inch or more of paver edge within one growing season.
Solution: Replace standard mason sand with polymeric sand containing acrylic binding agents. Activate with fine mist totaling 0.25 inches of water applied over 20 minutes. The cured joint resists ant excavation (Tetramorium species) and washout during 2-inch rainfall events.
Symptom: Lippage (vertical displacement) exceeding 0.125 inch between adjacent pavers after first freeze-thaw cycle.
Solution: Indicates inadequate base compaction or subsurface moisture accumulation. Excavate affected area to subgrade. Install 4-inch perforated PVC drain pipe in 8-inch trench filled with No. 57 stone. Slope pipe 1% toward discharge point. Rebuild base in compacted lifts.
Symptom: Efflorescence (white crystalline deposits) appearing on concrete or brick paver surfaces.
Solution: Soluble salts migrating via capillary action. Apply penetrating silane/siloxane sealer at 200 square feet per gallon after surfaces dry completely. The hydrophobic barrier blocks moisture transport while maintaining vapor permeability. Reapply every 36 months.
Symptom: Sagina subulata (Irish moss) or Thymus serpyllum (creeping thyme) dying in joints despite adequate moisture.
Solution: Polymeric sand pH exceeds 9.0, inhibiting root establishment. Remove sand to 1.5-inch depth using a hook knife. Refill with 60% coarse sand, 30% compost (C:N ratio 25:1), and 10% perlite. This blend maintains pH 6.5-7.0 and provides auxin distribution pathways for stoloniferous growth.
Symptom: Rubber paver surface degradation with 2mm material loss after 18 months.
Solution: UV exposure breaks polyisoprene bonds. Apply water-based polyurethane coating (40% solids) annually in spring. The sacrificial layer absorbs photodegradation while extending paver lifespan to 12 years.
Maintenance
Apply 1 inch of water weekly during establishment phase (first 60 days) to settle base materials and encourage joint vegetation rooting. Sweep pavers monthly with stiff-bristle broom to prevent organic debris accumulation that reduces surface friction and harbors fungal pathogens.
Inspect joints biannually for erosion or vegetation die-off. Refill voids immediately using matching material to prevent lateral paver movement. Concrete and stone surfaces benefit from neutral pH cleaner (7.0) applied at 1 ounce per gallon, scrubbed with nylon brush, and rinsed thoroughly.
Edges require annual redefinition. Cut turf 1 inch from paver perimeter using a half-moon edger sharpened to 20-degree bevel. This prevents Poa and Festuca rhizome encroachment that lifts border units.
Reapply polymeric sand stabilizer every 36 months. Remove degraded material to full joint depth, clean with compressed air (90 psi), install fresh sand, and activate with calibrated misting.
FAQ
Which paver material withstands freeze-thaw cycles in Zone 4?
Natural flagstone with absorption rate below 3% and concrete pavers exceeding 4,000 psi compressive strength survive repeated freezing. Avoid recycled brick showing visible cracks or salmon-colored cores indicating under-firing.
How deep should the aggregate base extend?
Clay soils require 8 inches. Sandy loams need 6 inches. Add 2 inches in high-traffic areas or where vehicular crossings occur. Each inch of compacted base supports approximately 500 pounds per square foot.
Can pavers install directly over existing lawn?
No. Decomposing organic matter reduces bearing capacity and creates voids. Remove sod and 2 inches of topsoil. The root mat retains moisture, promoting differential settling and encouraging Trifolium repens resurgence through joints.
What joint width prevents weed germination?
Gaps below 0.25 inch filled with polymeric sand block most weed seed establishment. Wider joints (0.5-2.0 inches) support intentional planting of Thymus praecox or Sedum acre, which outcompete annual weeds through allelopathic root exudates.
How long before full pedestrian traffic?
Rigid pavers accept traffic immediately after polymeric sand activation (24-hour cure). Flagstone installations require 72 hours for bedding sand consolidation. Permeable systems need 7 days for aggregate interlock stabilization under the first 100 loading cycles.